
Chris Hillman
Wednesday, November 26, 2025
Building Your First AWS Data Pipeline: A Guide for Data Professionals Who've Never Touched Cloud Infrastructure
The spreadsheet that changed everything
Here’s a story that might sound familiar. You’re pulling data from an API—maybe daily sales numbers, maybe customer interactions, maybe something else entirely. Every morning, you open your laptop, run a Python script, save the CSV somewhere, and get on with your actual work. It takes maybe five minutes, but it’s five minutes you can’t forget about. Miss a day and you’ve got a gap in your data. Go on vacation? Better hope someone remembers to run your script.
I watched a colleague do this for six months before he finally asked: “There’s got to be a better way, right?”
Yeah. There absolutely is. What if you could build a system that downloads data automatically, stores it properly, and makes it queryable—all without you managing servers or remembering to run scripts? What if that system cost you about $2 per month and scaled to handle gigabytes or terabytes without breaking a sweat?
That’s what we’re building today using AWS. By the end of this guide, you’ll understand how professional data teams actually structure their cloud infrastructure, not just theoretically but hands-on. You’ll have built a working data pipeline that ingests data from an API, stores it following industry standards, and lets you query it using SQL as if it were sitting in a database.
No prior AWS experience needed. No server management required. Just follow along, and in about an hour, you’ll have infrastructure you could deploy in production. Let’s get started.
Why the cloud matters more than you think
Before we write any code or click anything in AWS, let’s talk about why this approach fundamentally changes how data work happens.
Traditional data infrastructure requires servers. You buy physical machines (or rent virtual ones), install databases, configure networking, manage security patches, monitor disk space, worry about backups, handle scaling when data grows. It’s a full-time job—literally. Companies hire entire teams just to keep the infrastructure running.
Cloud infrastructure flips this model. Instead of managing servers, you use services. Need storage? Use S3. Need to run code? Use Lambda. Need to query data? Use Athena. Each service handles its own scaling, security, backups, and maintenance. You just use them.
The economics are compelling. Research from 451 Research found that companies using cloud services reduce infrastructure costs by an average of 30-40% compared to on-premises solutions. But cost isn’t even the biggest advantage. The real benefit is speed. What used to take weeks of procurement, setup, and configuration now takes minutes.
For data professionals specifically, this matters because you can focus on extracting value from data instead of maintaining infrastructure. You’re not a systems administrator. You’re someone who needs reliable data storage, automated processing, and easy querying. AWS provides exactly that.
Here’s what we’re building today: a serverless data pipeline. “Serverless” doesn’t mean there are no servers—there are servers, you just don’t manage them. It’s like how you use electricity without maintaining a power plant. You use the service, AWS handles the infrastructure.
The specific pipeline we’ll build follows a pattern so common in industry that once you recognize it, you’ll see it everywhere. API data flows into Lambda functions running on a schedule. Lambda stores raw data in S3, organized by date. AWS Glue catalogs the data structure. Athena queries the data using SQL. This exact architecture powers data pipelines at companies ranging from startups to Fortune 500s.
Let’s break down each component.
S3: Understanding the foundation of modern data storage
Amazon S3 (Simple Storage Service) is probably the most important AWS service to understand. Not because it’s complex—it’s actually remarkably simple—but because it’s foundational. Nearly every data pipeline on AWS touches S3 at some point.
Think of S3 as an infinite file system. You create buckets (essentially folders), upload files, organize them into more folders, and retrieve them when needed. That’s it. But the elegance is in what S3 handles automatically:
Durability: S3 provides 99.999999999% durability (that’s eleven nines). In practical terms, if you store 10 million files in S3, you can expect to lose one file every 10,000 years. You’re more likely to lose data from your laptop than from S3.
Scalability: S3 scales automatically. Store one file or one billion files—S3 doesn’t care. No capacity planning required. No running out of disk space. Just upload data and S3 expands to accommodate it.
Availability: S3 is designed for 99.99% availability, meaning it’s accessible 99.99% of the time. For most data pipelines, brief unavailability during off-peak hours doesn’t matter, but if you need higher availability, S3 offers different storage classes with varying guarantees.
Cost efficiency: S3 charges approximately $0.023 per GB per month. That’s about $23 to store a terabyte. Compare that to buying and maintaining physical storage, and the economics are compelling.
But the real power of S3 comes from how other AWS services integrate with it. Lambda can write to S3. Glue can catalog S3 data. Athena can query S3 directly. EMR can process S3 files. Redshift can load from S3. The entire AWS ecosystem orbits around S3 as the central data store.
This is why data teams use the term “data lake”—S3 serves as the repository where all raw data lands before being processed, transformed, or analyzed. The lake metaphor fits because you dump everything in, organize it later, and fish out what you need when you need it.
Let’s create your first bucket and establish the organizational patterns professionals use.
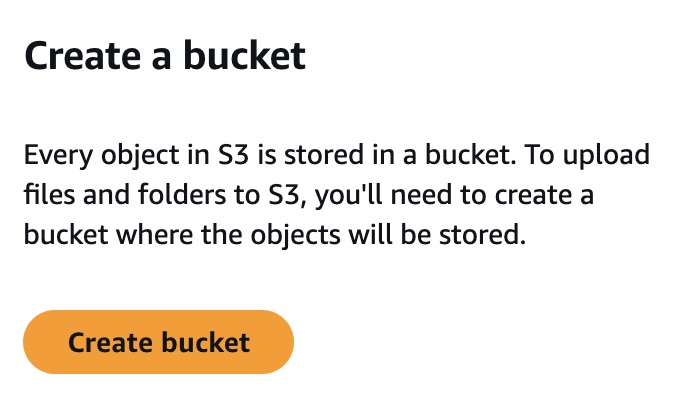
Creating your S3 bucket: The details that actually matter

Open the AWS Console and search for S3. You’ll see a dashboard showing existing buckets (probably none if this is your first time). Click “Create bucket.”
The first critical decision: bucket name. Here’s what matters:
- Globally unique: Every S3 bucket name across all AWS accounts worldwide must be unique. Not just unique to you—unique period. This is because bucket names become part of URLs:
https://your-bucket-name.s3.amazonaws.com/ - Naming conventions: Use lowercase letters, numbers, and hyphens. No underscores, no uppercase, no spaces. Keep it descriptive but concise.
I’m naming mine spansh-data-pipeline-ch-2025. The date suffix helps ensure uniqueness. In production environments, teams often use patterns like company-team-purpose-environment-date (e.g., acme-analytics-sales-prod-2025).
Region selection: Buckets exist in specific AWS regions. This matters for two reasons:
- Latency: Data access is faster when the bucket is geographically closer to the service accessing it
- Compliance: Some regulations require data to stay in specific geographic regions
Choose the region closest to where you or your services will access the data. I’m using us-east-1 because it’s AWS’s original region, tends to get new features first, and often has the most competitive pricing.
Block Public Access: See those four checkboxes about blocking public access? Keep them all checked. By default, S3 blocks all public access to your data, which is exactly what you want. The number of data breaches caused by accidentally public S3 buckets is staggering. Capital One’s 2019 breach exposed data of 100 million people partly due to misconfigured S3 permissions. Don’t be a statistic. Block public access.
Versioning: Enable this. Versioning means S3 keeps every version of every file you upload. If you overwrite a file, the old version remains accessible. If you delete a file, S3 keeps it (marked as deleted) and you can restore it. This is your insurance policy against mistakes. The cost is minimal—you only pay for the storage of old versions—but the protection is invaluable.
Click through the rest of the settings (the defaults are fine), and create your bucket.
Organizing your data: The partition pattern that scales
You’ve got an empty bucket. Before adding any data, let’s establish an organizational structure that will serve you whether you’re storing megabytes or petabytes.
The pattern we’re using is called partitioning, and it looks like this:
This structure is deliberate. Let me explain why each piece matters:
raw/: This is your persistent staging layer. Data lands here first, exactly as received from the source. Never modify raw data. Never delete raw data. If something goes wrong downstream—a transformation bug, a bad query, a misunderstood requirement—you can always return to the raw data and start over. This folder is sacred.
spansh/: The data source. If you’re ingesting from multiple sources, you’ll have multiple folders here: salesforce/, stripe/, google-analytics/, whatever. This keeps sources separated and makes permissions management easier.
year=YYYY/month=MM/day=DD/: This is partition scheme, and it’s where the magic happens. When you query this data later using Athena, you can filter by date without scanning every file ever created. Instead of “search all files for records from January 22,” you tell Athena “only look in the year=2025/month=01/day=22 folder.” This makes queries faster and cheaper (Athena charges by data scanned).
The specific format—year=2025 rather than just 2025—is Hive-style partitioning. It’s a standard format that AWS Glue and Athena recognize automatically. When Glue crawls this data, it understands that year, month, and day are partition columns and configures the table schema accordingly.
Alternative structures exist: year/month/day, yyyy-mm-dd, source/date/hour. The choice depends on query patterns. Daily partitions work for most use cases. If you’re ingesting data hourly, add an hour=HH level. If data arrives weekly, daily partitions might create too many folders. Adjust based on your access patterns.
Partitioning strategy is only half the battle—file size within those partitions determines whether your queries run smoothly or become expensive disasters.
The sweet spot for S3 files in data lake architectures is typically 128MB to 1GB. Why? Because of how distributed query engines like Athena actually work.
When Athena reads your data, it splits work across multiple parallel workers. Each worker grabs a chunk of data to process. If your partition contains one massive 5GB file, you get limited parallelism—maybe only a few workers can operate simultaneously, and some might run out of memory trying to process such large chunks. Your query takes longer, costs more, and might even fail.
But here’s the twist: having thousands of tiny files is worse. Much worse.
Say you’re ingesting data every few minutes and each file is 5MB. After a month, you have 8,000 files in a single partition. When Athena queries that partition, it needs to:
- List all 8,000 files (API calls to S3)
- Open each file (more API calls)
- Read the metadata from each file
- Coordinate across thousands of small tasks
This creates what’s known as the “small files problem.” You’re drowning in metadata operations. The query engine spends more time managing files than actually processing data. You get some parallelism, sure, but the overhead destroys any benefit. Queries are slow despite having multiple files. Costs are higher because you’re paying for all those S3 API calls and Athena has to scan metadata for thousands of tiny files.
Real example: I’ve seen cases where a partition with 10,000 files totaling 50GB took longer to query than a partition with 50 files totaling 500GB. The metadata overhead from thousands of small files was the killer.
The solution? Batch and compact your data before writing to S3. If your Lambda function runs every 5 minutes and produces small files, you have two options:
Option 1: Buffer data in memory and only write to S3 once you’ve accumulated 100MB+ of data. This requires tracking state across Lambda invocations, which adds complexity.
Option 2: Write small files to a temporary location, then run a separate compaction process (maybe hourly) that reads all small files for a partition and writes them out as properly-sized files. This is cleaner and more reliable.
For the data we’re working with, files are naturally around 100-200MB compressed, which is perfect. But if you’re adapting this pattern for high-frequency data ingestion—like streaming sensor data or click events—pay attention to file sizes. You’ll save yourself headaches and money.
Create these folders in your bucket now (through the console, just click “Create folder” and build the hierarchy). Once you have the structure in place, we’re ready to add the automation.
Lambda: The robot that never sleeps
Lambda is AWS’s serverless compute service, and if you’ve never worked with serverless before, the concept might feel strange at first. But stick with me—once you get it, you’ll wonder how you ever lived without it.
Traditional computing requires servers. You spin up a virtual machine (EC2 in AWS terms), install your code, run it, and the server sits there consuming resources (and costing money) whether it’s doing work or not. Even if your code runs for 5 minutes per day, you’re paying for 24 hours of server time.
Lambda inverts this. You write code, upload it to Lambda, specify a trigger, and Lambda runs your code only when triggered. The code executes, completes, and Lambda terminates the execution environment. You pay only for the compute time you actually use, measured in milliseconds.
For scheduled tasks—like pulling data from an API once every day—this is perfect. Your code runs once daily, downloads data, saves it to S3, and stops. Total execution time: maybe 10-30 seconds. Total cost: fractions of a cent.
The constraints you need to know:
- 15-minute maximum runtime: Lambda kills any function running longer than 15 minutes. For data ingestion from APIs, this is rarely an issue. For processing multi-gigabyte files, you’d need a different approach.
- 10GB maximum memory: Memory allocation ranges from 128MB to 10GB. More memory also means more CPU power, but for API calls, even 512MB is usually plenty.
- 512MB temporary storage: Lambda provides
/tmpstorage during execution, but it’s cleared between runs. Don’t try to store data in Lambda itself—always write to S3.
These limitations make Lambda unsuitable for certain tasks (long-running batch processing, stateful applications, extremely large data processing). But for scheduled API ingestion? Lambda is ideal.
Let’s build our function.
Building the Lambda function that does the actual work

Navigate to Lambda in the AWS Console. Click “Create function.” You’ll see three options:

- Author from scratch (we’ll use this)
- Use a blueprint (pre-built templates)
- Container image (for more complex deployments)
Choose “Author from scratch” and provide:
- Function name:
spansh-data-ingestion(descriptive, hyphenated, no spaces) - Runtime: Python 3.11 (or latest available—Lambda supports multiple languages, but Python is excellent for data work)
- Architecture: x86_64 (the default—arm64 is cheaper but x86_64 has better compatibility)

For permissions, Lambda needs to assume a role that grants it access to other AWS services. Click “Create a new role with basic Lambda permissions.” This creates an IAM role with permissions to write logs to CloudWatch (for debugging). We’ll add S3 permissions shortly.
Click “Create function” and AWS sets up your Lambda environment.
You’ll land on the function configuration page. The center shows a code editor with a default template. Delete that template—we’re writing our own.
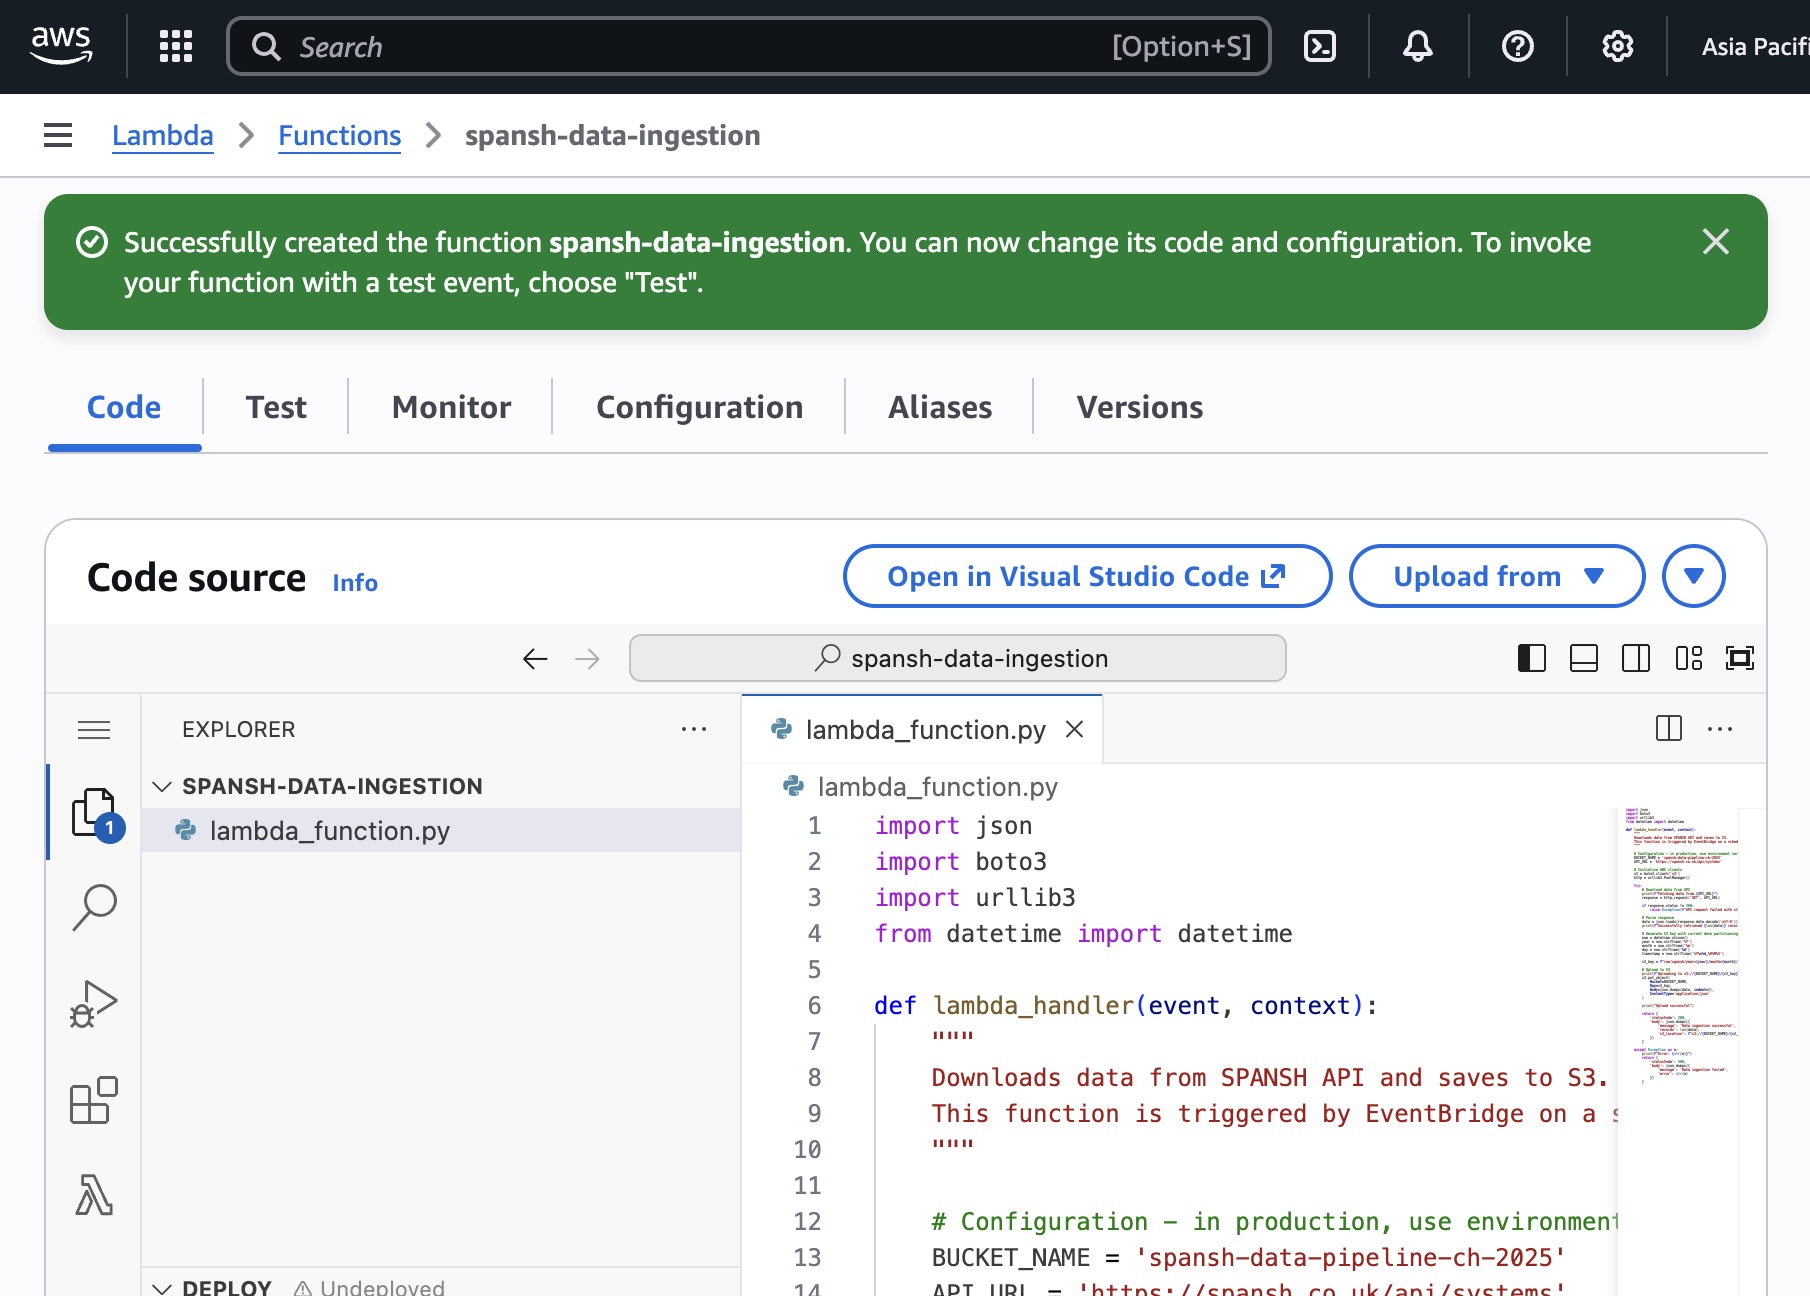
Here’s the code we’re implementing:
import json
import boto3
import urllib3
from datetime import datetime

def lambda_handler(event, context):
    """
    Downloads data from SPANSH API and saves to S3.
    This function is triggered by EventBridge on a schedule.
    """

    # Configuration - in production, use environment variables
    BUCKET_NAME = 'spansh-data-pipeline-ch-2025'
    API_URL = 'https://spansh.co.uk/api/systems'

    # Initialize AWS clients
    s3 = boto3.client('s3')
    http = urllib3.PoolManager()

    try:
        # Download data from API
        print(f"Fetching data from {API_URL}")
        response = http.request('GET', API_URL)

        if response.status != 200:
            raise Exception(f"API request failed with status {response.status}")

        # Parse response
        data = json.loads(response.data.decode('utf-8'))
        print(f"Successfully retrieved {len(data)} records")

        # Generate S3 key with current date partitioning
        now = datetime.utcnow()
        year = now.strftime('%Y')
        month = now.strftime('%m')
        day = now.strftime('%d')
        timestamp = now.strftime('%Y%m%d_%H%M%S')

        s3_key = f"raw/spansh/year={year}/month={month}/day={day}/spansh_{timestamp}.json"

        # Upload to S3
        print(f"Uploading to s3://{BUCKET_NAME}/{s3_key}")
        s3.put_object(
            Bucket=BUCKET_NAME,
            Key=s3_key,
            Body=json.dumps(data, indent=2),
            ContentType='application/json'
        )

        print("Upload successful")

        return {
            'statusCode': 200,
            'body': json.dumps({
                'message': 'Data ingestion successful',
                'records': len(data),
                's3_location': f"s3://{BUCKET_NAME}/{s3_key}"
            })
        }

    except Exception as e:
        print(f"Error: {str(e)}")
        return {
            'statusCode': 500,
            'body': json.dumps({
                'message': 'Data ingestion failed',
                'error': str(e)
            })
        }
Let’s break down what this code does, because understanding each piece helps you adapt it for your own APIs:
Import statements: We’re using boto3 (AWS’s Python SDK for interacting with AWS services), urllib3 (for HTTP requests—simpler than requests and doesn’t require external dependencies), and datetime (for generating date-based paths).
lambda_handler function: This is the entry point. Lambda calls this function when triggered. The parameters event and context contain information about the trigger and execution environment (we’re not using them here, but they’re standard).
Configuration: The bucket name and API URL are hardcoded here for simplicity. In production, you’d use environment variables (Lambda lets you set these in the function configuration) or AWS Systems Manager Parameter Store for more secure configuration management.
AWS client initialization: boto3.client('s3') creates an S3 client for uploading files. Lambda automatically provides credentials for the IAM role attached to the function—no need to manage API keys.
API request: We fetch data from the SPANSH API. If the request fails, we raise an exception, which triggers the error handling block.
Partition path generation: This is crucial. We generate the S3 key using the current date, creating that year=YYYY/month=MM/day=DD structure we discussed. The timestamp in the filename ensures multiple uploads per day don’t overwrite each other.
S3 upload: s3.put_object() writes the JSON data to S3. We’re formatting the JSON with indentation (indent=2) to make it human-readable—useful for debugging. In production with massive files, you’d skip this to reduce file size.
Error handling: The try/except block catches any failures and returns an appropriate error message. Importantly, we’re using print() statements throughout. These logs appear in CloudWatch, AWS’s logging service, which is invaluable for debugging.
Return value: Lambda functions should return a response. Here we’re returning HTTP-style status codes and messages, though since we’re running on a schedule (not via API Gateway), nothing actually receives this response. Still, it’s good practice—makes the function reusable if you later expose it as an API.
Copy this code into the Lambda editor and click “Deploy” to save.
But we’re not done yet. This function will fail if you test it right now. Why? Permissions.
Giving Lambda permission to write to S3
Lambda runs with the permissions granted by its IAM role. By default, that role can only write logs. It cannot access S3. We need to fix that.

In your Lambda function page, click the “Configuration” tab, then “Permissions” in the left sidebar. You’ll see the execution role Lambda is using. Click the role name—it opens in a new tab showing the IAM console.

You’ll see an “Add permissions” button. Click it and choose “Attach policies.” Search for AmazonS3FullAccess and attach it.
Wait—full access? Isn’t that dangerous?
Yes. In production, you’d follow the principle of least privilege: grant only the specific permissions needed (in this case, s3:PutObject on the specific bucket and path). But for learning and prototyping, full S3 access is easier. Just remember to tighten permissions before production deployment.
The proper policy would look like this:
{
  "Version": "2012-10-17",
  "Statement": [
    {
      "Effect": "Allow",
      "Action": ["s3:PutObject"],
      "Resource": "arn:aws:s3:::spansh-data-pipeline-ch-2025/raw/*"
    }
  ]
}
This grants permission to write objects (files) only within the raw/ prefix of your specific bucket. Nothing else. If you’re comfortable with IAM policies, create this custom policy instead of using the full access policy.
Now Lambda can write to S3. Let’s test it.
Testing Lambda before scheduling it
In the Lambda console, click the “Test” tab. Lambda provides a test event feature that simulates triggers. Since our function doesn’t actually use the event data, the default test event works fine. Click “Test.”
Watch the execution results panel. If everything works, you’ll see:
- Execution successful
- Logs showing each print statement
- The return value with status 200 and the S3 location
If it fails, read the error message carefully. Common issues:
- “Access Denied”: IAM permissions aren’t configured correctly
- “Unable to import module”: Code syntax error or missing dependency
- “Timeout”: Function took longer than the configured timeout (default is 3 seconds—we need to increase that)
Speaking of timeout: Go to Configuration → General configuration → Edit. Set the timeout to 60 seconds (1 minute). This gives Lambda enough time to download data and upload to S3. The default 3 seconds isn’t enough for API calls.
Once your test succeeds, check S3. Navigate to your bucket and drill into the folder structure. You should see a JSON file in the correct date-partitioned folder. Open it to verify the data looks correct.
Congratulations—you’ve manually triggered your first Lambda function to ingest data into S3. Now let’s make it run automatically.
EventBridge: The clock that triggers your pipeline
Your Lambda function works perfectly when you manually test it. But the whole point is automation—having it run on a schedule without you clicking anything.
Enter Amazon EventBridge (formerly called CloudWatch Events—you might see that name in older documentation). EventBridge is a serverless event bus that routes events from various sources to various targets. We’re using its scheduler feature to trigger Lambda on a daily schedule.
EventBridge schedules are written using cron expressions or rate expressions, the same syntax used in Unix systems for decades. If you’ve ever scheduled anything on a Linux server, you already know this syntax.
Let’s create the schedule.
Creating the EventBridge schedule

In the AWS Console, search for “EventBridge” and select “EventBridge Scheduler” (not “EventBridge Rules”—Scheduler is the newer, simplified interface).

Click “Create schedule.” You’ll walk through a wizard:
Schedule name: spansh-daily-ingestion (descriptive, indicates what it does)
Schedule pattern: Choose “Recurring schedule”
For the cron expression, you have options:
- Rate expressions: Simple intervals like “every 1 day” or “every 6 hours”
- Cron expressions: More precise control like “every day at 3 AM UTC”
Let’s use a cron expression for precision. The syntax is:
For daily at 9 AM UTC:
What this means:
0: Minute 0 (on the hour)9: Hour 9 (9 AM)*: Any day of month*: Any month?: Any day of week (? is required when * is used for day-of-month)*: Any year
Important: EventBridge uses UTC time. If you want 9 AM in your local timezone, adjust accordingly. For example, if you’re in US Eastern Time (UTC-5), 9 AM EST is 2 PM UTC, so use cron(0 14 * * ? *).
Flexible time window: You can add a window where the schedule might execute (e.g., “anytime within 1 hour”). This helps AWS optimize resource usage. For data ingestion, exact timing usually doesn’t matter, so a 15-minute window is fine.
Timezone: Choose your timezone (AWS adjusts the cron expression automatically).
Click “Next.”
Target: Select “AWS Lambda” and choose your spansh-data-ingestion function from the dropdown.
Payload: Leave empty—our function doesn’t use event data.
Click through the remaining settings (defaults are fine) and create the schedule.
You’ve now built a complete automated data pipeline. Every day at your scheduled time, EventBridge triggers Lambda, which downloads data from the API and stores it in S3 in a properly partitioned structure.
But we’re not quite done. The data is in S3, but querying it directly is cumbersome. We need to make this data accessible via SQL.
Glue: Teaching AWS about your data structure
You’ve got JSON files sitting in S3, partitioned by date. To query this data using SQL, AWS needs to understand the structure: what columns exist, what data types they have, how the data is partitioned.
That’s where AWS Glue comes in—specifically, the Glue Data Catalog.
Think of the Glue Data Catalog as a metadata repository. It stores schemas (table definitions) that describe data in S3. Once Glue has cataloged your data, services like Athena can query it using SQL without you manually defining the schema every time.
Glue offers two approaches for cataloging data:
- Manual schema definition: You write code or use the console to explicitly define the schema
- Glue Crawlers: Automated processes that scan your S3 data, infer the schema, and create tables automatically
For most use cases, crawlers are easier. They’re like database schema discovery tools—point them at your data, and they figure out the structure.
Let’s create a crawler for our data.
Creating your first Glue Crawler
Navigate to AWS Glue in the console. On the left sidebar, click “Crawlers,” then “Create crawler.”
Crawler name: spansh-raw-data-crawler (descriptive and indicates it’s crawling raw data)
Data source: Click “Add a data source” and configure:
- Data source: S3
- S3 path: Browse to your bucket and select the
raw/spansh/prefix (not the full date-partitioned path—we want the crawler to discover all partitions) - Subsequent crawler runs: Choose “Crawl all sub-folders” so the crawler discovers new partitions as they’re added
IAM role: Glue needs permissions to read S3 and write to the Glue Data Catalog. You can either create a new role or use an existing one. If creating new, AWS automatically configures the necessary permissions.
Target database: Glue organizes tables into databases (similar to database schemas in traditional RDBMS). Create a new database called spansh_data.
Crawler schedule: You can schedule crawlers to run periodically (similar to how we scheduled Lambda). For now, choose “On demand”—we’ll manually trigger it after Lambda runs to create the initial table, then consider scheduling it later.
Configuration options: Leave the defaults. The crawler will automatically detect schema changes and add new partitions.
Create the crawler and click “Run crawler.”
The crawler takes a minute or two to complete. It scans your S3 data, infers the JSON structure, detects the date partitions, and creates a table in the Glue Data Catalog.
Once complete, navigate to “Databases” in the Glue console, click spansh_data, then “Tables.” You should see a table created by the crawler. Click it to view the schema.
You’ll see:
- Column names and types: Inferred from your JSON structure
- Partition keys:
year,month,daydetected from the folder structure - Table properties: Location in S3, format (JSON), and other metadata
This table definition is what Athena will use to query your S3 data.
Athena: Querying data without loading a database
This is where everything comes together. You have data in S3, organized properly, cataloged by Glue. Now you want to query it using SQL. Enter Amazon Athena.
Athena is a query engine that reads data directly from S3 using the schemas defined in Glue. There’s no database to set up, no data to load, no indexes to maintain. You write SQL, Athena executes it against your S3 files, and returns results.
The underlying technology is Presto/Trino, an open-source distributed SQL query engine originally developed at Facebook. AWS packages Presto as a managed service, handles all the infrastructure, and charges you only for the data scanned—approximately $5 per terabyte queried.
This pricing model has important implications: write efficient queries. Use partition filters. Limit the data scanned. We’ll cover optimization shortly, but first, let’s run some queries.
Setting up Athena and running your first query
Navigate to Amazon Athena in the console. The first time you open Athena, you’ll need to configure a location for query results. Athena saves query output to S3 (because where else would it go?).
Click “Settings” and specify an S3 path: s3://spansh-data-pipeline-ch-2025/athena-results/
Create this folder in your bucket if it doesn’t exist. Athena will write query results here.
Return to the query editor. In the left sidebar, you’ll see:
- Data source: AwsDataCatalog (Glue)
- Database:
spansh_data - Tables: Your crawler-created table
Click the three dots next to your table name and select “Preview table.” Athena generates and runs a SELECT * LIMIT 10 query automatically.
Within seconds, you see results. Data sitting in S3, queried using SQL, no database setup required. That’s Athena.
Let’s write some more interesting queries.
Useful queries for validating your pipeline
Check total record count:
SELECT COUNT(*) as total_records
FROM spansh_data.your_table_name;
This scans all data to count records. Notice how Athena shows “Data scanned” at the bottom of the results—that’s what you’re paying for.
Check records by date partition:
SELECT year, month, day, COUNT(*) as records
FROM spansh_data.your_table_name
GROUP BY year, month, day
ORDER BY year, month, day;
This shows how many records exist in each partition—useful for verifying your ingestion is running daily.
Query specific date range:
SELECT *
FROM spansh_data.your_table_name
WHERE year = '2025'
  AND month = '01'
  AND day = '22'
LIMIT 100;
Notice we’re filtering on partition columns. Athena only scans files in that specific partition, making the query fast and cheap.
Without partition filters:
SELECT *
FROM spansh_data.your_table_name
WHERE some_column = 'some_value'
LIMIT 100;
This scans ALL files across ALL partitions looking for matching records. Expensive and slow. Always filter on partitions when possible.
Keeping partitions updated
Here’s a gotcha: when Lambda adds new files to S3 in new date partitions, Glue doesn’t automatically know about them. Your table still only knows about partitions that existed when the crawler last ran.
You have three options:
1. Run the crawler daily: Schedule the Glue crawler to run after your Lambda function completes (e.g., Lambda runs at 9 AM, crawler runs at 10 AM). The crawler discovers new partitions and updates the table.
2. Manual partition updates: Run this command in Athena after new data arrives:
MSCK REPAIR TABLE spansh_data.your_table_name;
This scans S3 for new partitions and updates the Glue catalog without running a full crawler.
3. Add partitions explicitly: If you know the partition path, add it directly:
ALTER TABLE spansh_data.your_table_name
ADD PARTITION (year='2025', month='01', day='23')
LOCATION 's3://spansh-data-pipeline-ch-2025/raw/spansh/year=2025/month=01/day=23/';
For daily data ingestion, option 1 (scheduled crawler) is most reliable. Configure your EventBridge schedule to run the crawler shortly after Lambda completes.
Understanding costs: What you’re actually paying for
Let’s talk money, because surprisingly, this entire setup costs almost nothing to run.
S3 storage: $0.023 per GB per month. If you’re storing 10GB of data, that’s $0.23 per month.
Lambda execution: First 1 million requests per month are free, then $0.20 per million requests. Each request gets 400,000 GB-seconds of compute free, then $0.0000166667 for every GB-second thereafter. If your Lambda function uses 512MB and runs for 30 seconds daily, that’s about 15GB-seconds per month—well within the free tier.
Glue crawler: $0.44 per hour (prorated per second). Running a crawler for 2 minutes daily costs about $0.30 per month.
Athena queries: $5 per TB scanned. If you scan 1GB per month in queries, that’s $0.005.
Total monthly cost: Less than $1 for small-scale usage. Even at moderate scale (100GB storage, daily ingestion, regular querying), you’re looking at $5-10 per month.
Compare that to running a dedicated database server (RDS starting at $25/month minimum) or an EC2 instance for scheduled tasks ($10-50/month depending on size). The serverless approach is dramatically cheaper for intermittent workloads.
The bigger savings aren’t even the dollars—it’s the time. No patching servers, no managing backups, no worrying about scaling, no 2 AM pages when something crashes. You write code, configure services, and it runs.
That said, costs can spiral if you’re not careful:
Common mistakes that inflate costs:
- Running queries without LIMIT clauses: Testing a query on production data without
LIMITcan scan terabytes accidentally - Not using partition filters: Scanning all data when you only need recent data
- Over-running crawlers: Scheduling crawlers hourly when daily would suffice
- Not compressing data: JSON is inefficient; gzipping files reduces storage and query costs by 70-80%
- Leaving Lambda triggers enabled during development: If you’re testing and forget to disable the schedule, it runs daily even when you don’t want it
Set up billing alerts in AWS (under AWS Budgets) to notify you if costs exceed thresholds. For this pipeline, alert at $10/month—if you hit that, something’s misconfigured.
When this pattern works (and when it doesn’t)
The architecture we’ve built—Lambda for ingestion, S3 for storage, Glue for cataloging, Athena for querying—is incredibly versatile. But it’s not appropriate for every scenario.
This pattern excels when:
- Data arrives in batches (hourly, daily, weekly) rather than as a continuous stream
- You need historical data retention without database costs
- Multiple teams need access to the same data
- Data volumes range from gigabytes to petabytes
- Query patterns are analytical (aggregations, scans) rather than transactional (point lookups, updates)
- You’re okay with eventual consistency rather than immediate data availability
This pattern struggles when:
- You need real-time data (use Kinesis Streams instead)
- You require sub-second query response times (use a database or cache)
- Data undergoes frequent updates or deletes (S3 is append-only in practice)
- You need ACID transactions (use RDS or DynamoDB)
- File sizes are extremely large per record (>10GB) and Lambda isn’t sufficient (use EMR or Glue ETL jobs)
Most data engineering work falls into the “batch processing” category that this pattern handles well. Customer data, transaction logs, application events, API data, log files—these all fit the model.
Real-world examples from industry:
Netflix processes billions of events daily using a similar architecture, ingesting data into S3, cataloging with Glue, and querying with Athena and other analytics engines.
Airbnb uses S3 as the foundation of their data lake, storing raw logs and datasets that teams query using Presto (which Athena is built on).
Uber built their big data platform on S3, processing petabytes of trip data using variations of this exact pattern.
These companies operate at massive scale, but the fundamentals remain the same as what you’ve built today. The services scale seamlessly—what works for 1GB works for 1PB.
What comes next: Building on your foundation
You’ve built a working data pipeline. Data flows from an API into Lambda, gets stored in partitioned S3 folders, cataloged by Glue, and queried using SQL in Athena. That’s a real accomplishment. But data pipelines are rarely finished—they evolve based on requirements.
Here are logical next steps, ordered from easiest to most complex:
Error handling and monitoring:
- Add CloudWatch alarms to alert when Lambda fails
- Configure SNS (Simple Notification Service) to email you on errors
- Implement retry logic in Lambda for transient failures
- Add detailed logging for debugging
Data transformation:
- Create a second Lambda function that transforms raw data (cleaning, normalizing, enriching)
- Store transformed data in
processed/folder with its own partitions - Use Glue ETL jobs for more complex transformations
Data quality checks:
- Validate data completeness (did we get the expected number of records?)
- Check data freshness (is today’s data present?)
- Detect schema changes (have column names or types changed?)
- Implement automated alerts when quality issues arise
Incremental loading:
- Modify Lambda to only download changed records instead of full datasets
- Implement change data capture (CDC) patterns
- Track state between runs using DynamoDB
Multiple data sources:
- Replicate this pattern for additional APIs
- Create separate Lambda functions for each source
- Organize by source in S3 (
raw/source1/,raw/source2/) - Consolidate in processed layer for unified analytics
Advanced querying:
- Create Athena views for commonly-used queries
- Implement incremental materialization (saving query results for reuse)
- Experiment with other query engines (Presto, Spark on EMR)
- Connect Athena to BI tools like Tableau or PowerBI
Cost optimization:
- Convert JSON to Parquet format (columnar storage reduces costs by 70-90%)
- Implement S3 Lifecycle Policies to move old data to cheaper storage classes
- Use Athena’s partition projection instead of crawlers
- Compress files with gzip or Snappy
Infrastructure as code:
- Define your entire pipeline using AWS CloudFormation or Terraform
- Version control your infrastructure definitions
- Enable reproducible deployments across environments (dev/staging/prod)
CI/CD pipelines:
- Implement automated testing for Lambda functions
- Deploy code changes through proper release pipelines
- Use AWS CodePipeline for continuous deployment
Alternative Triggers - push
- Files land in S3 unpredictably
- Real-time or near-real-time processing required
- Cost optimization matters (avoiding unnecessary invocations)
Start with monitoring and error handling—these protect your pipeline. Then expand to transformation and quality checks. The rest depends on your specific needs.
The beauty of this architecture is modularity. Add components incrementally without redesigning the entire system. That’s why it’s so common in industry—it scales both technically and organizationally.
The bigger picture: What you’ve actually learned
If you followed along and built this pipeline, you’ve gained more than just AWS skills. You’ve learned fundamental patterns that transfer across technologies and cloud providers.
The concept of data lakes: Storing raw data in cheap object storage, organizing by partitions, processing separately from storage. Azure uses Blob Storage with Data Lake Gen2. Google Cloud uses Cloud Storage. The implementation varies, but the pattern persists.
Serverless computing: Running code without managing servers. Azure Functions and Google Cloud Functions work nearly identically to Lambda. Once you understand serverless, you understand it everywhere.
Schema-on-read: Defining structure when querying data rather than when storing it. This flexibility is why data lakes outcompete traditional databases for analytical workloads. Databricks, Snowflake, BigQuery—they all embrace this model.
Event-driven architecture: Triggers, functions, and actions. This pattern appears in modern application development, microservices, and data engineering. Understanding EventBridge helps you understand Kubernetes CronJobs, Apache Airflow, and every other scheduler.
Infrastructure as code principles: Even though we used the console today, production environments define everything as code. The services you configured—S3 buckets, Lambda functions, Glue tables—can all be defined in CloudFormation, Terraform, or AWS CDK. That’s how real data teams operate.
Cost-conscious engineering: Understanding how services charge (storage vs compute vs data scanned) shapes design decisions. This mindset transfers to any cloud platform and many on-premises tools.
These aren’t AWS-specific skills. They’re data engineering fundamentals wrapped in AWS packaging. Learn them on AWS, apply them anywhere.
Some final practical wisdom
Before you close this guide and start building your own pipelines, let me share a few lessons learned from watching people implement this pattern—both successfully and unsuccessfully.
Start simple, evolve deliberately: The temptation exists to immediately add complexity—transformations, validations, multiple sources, fancy orchestration. Resist this. Build the basic pipeline first, verify it works, then add features one at a time. Most failed data projects collapse under premature complexity.
Documentation matters more than you think: Six months from now, you won’t remember why you partitioned a certain way or what that Lambda environment variable does. Comment your code. Document your decisions. Your future self will thank you.
Test with small data first: Don’t point your Lambda function at an API endpoint that returns 100GB of data for your first test. Start with APIs that return kilobytes. Verify everything works, then scale up.
Monitoring is not optional: In production, things fail. APIs go down. AWS services have brief outages. Lambda functions hit timeouts. Without proper monitoring, you won’t know until someone asks why the data’s missing. Set up CloudWatch alarms early.
Costs are usually predictable, but spikes happen: That $2/month pipeline can suddenly spike to $500 if you accidentally run a full-table scan on petabytes of data. Billing alerts save you from unpleasant surprises.
The AWS ecosystem is vast—don’t try to learn everything: We touched on maybe 5% of available AWS services today. That’s fine. Master these core services first. Expand as needs arise. Nobody knows all of AWS—everyone specializes.
Community resources beat documentation: AWS documentation is comprehensive but dry. When you’re stuck, search for blog posts, Stack Overflow answers, and YouTube tutorials. The community’s collective wisdom often explains concepts better than official docs.
Free tier is generous, use it: AWS provides 12 months of free tier for new accounts, including Lambda, S3, and many other services. Take advantage of it for learning and experimentation.